(I am an Amazon Associate and from time to time will use affiliate links for products that I love, or that I think you will find useful. Should you choose to purchase with the provided links, I will receive a small commission from Amazon at no cost to you.)
Although I didn’t have time to create many handmade gifts this year, I did want to stitch something simple and fun to give to friends and neighbors along with some homemade canned jellies. I’d picked up some needlework paper a while ago and while it’s traditionally used for cross stitch, I knew there could be a lot of other fun uses for it with embroidery. So I decided to make some personalized, embroidered gift tags to let people know I was thinking of them.
This gift tag project is very simple and uses easy embroidery stitches that are accessible to a beginner stitcher. Plus the tags can double as ornaments or even name placeholder cards for a holiday gathering. Download the free pattern below and follow the instructions to create some for your gift-giving this year!

Supplies Needed
Mill Hill® Perforated Paper (I used the color Ecru)
Ruler or Straight Edge
Pencil
Large sharp scissors
Small embroidery scissors
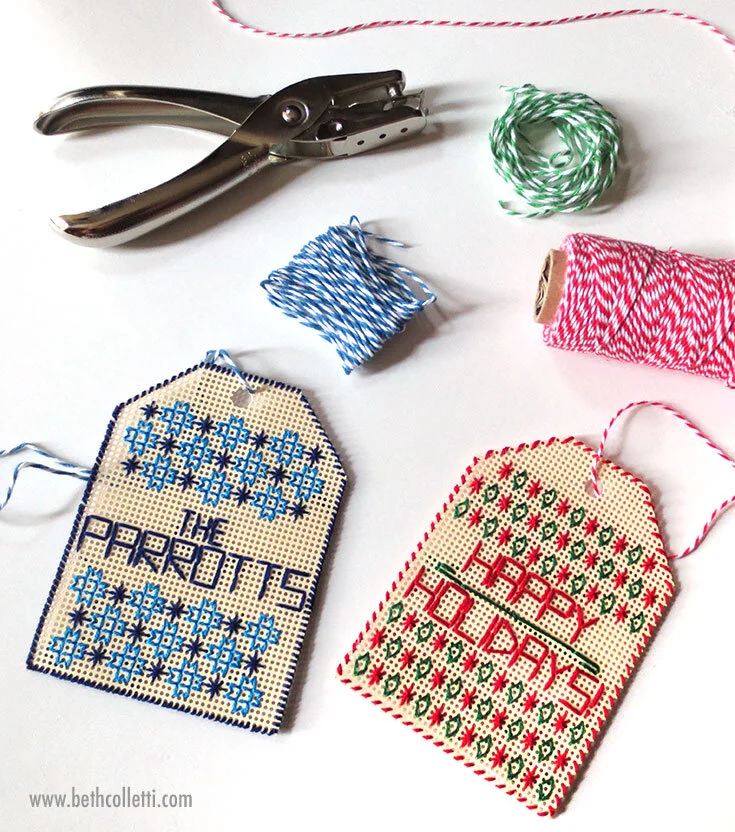
Six-Strand Embroidery Floss (I used colors DMC 321, 699, 995, and 820)
Size 5 Embroidery Needle
Bakers Twine in colors of your choice
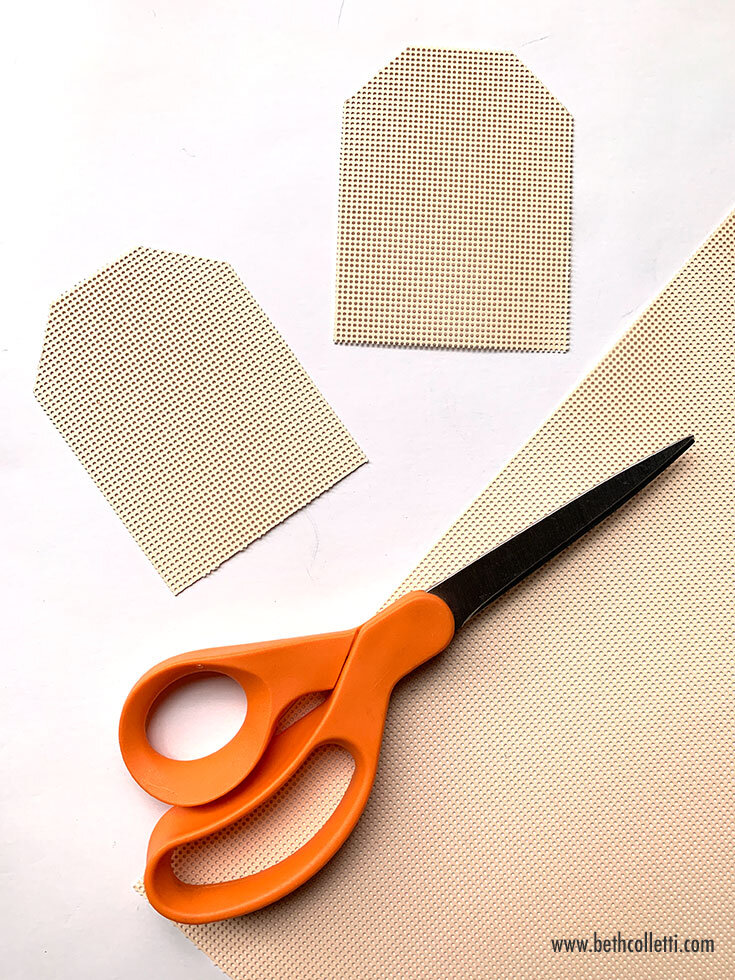
Step 1 - Cut Your Paper
Mill Hill® Perforated Paper is a 14-count (14 holes per inch) needlework paper that is 9x12 inches in size. Using a ruler, measure out 9 gift tags from a sheet, each measuring 3 inches wide x 4 inches tall in size. Cut each rectangular tag out and using the Downloadable Gift Tag Pattern as a guide, cut the top corners off of your gift tag so the top is angled.
Step 2 - Stitch Your Tags
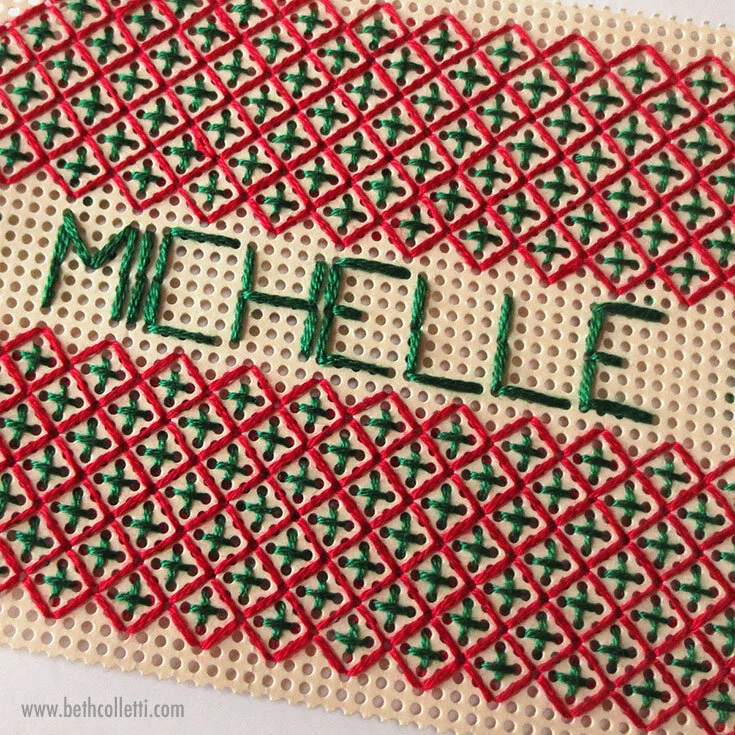
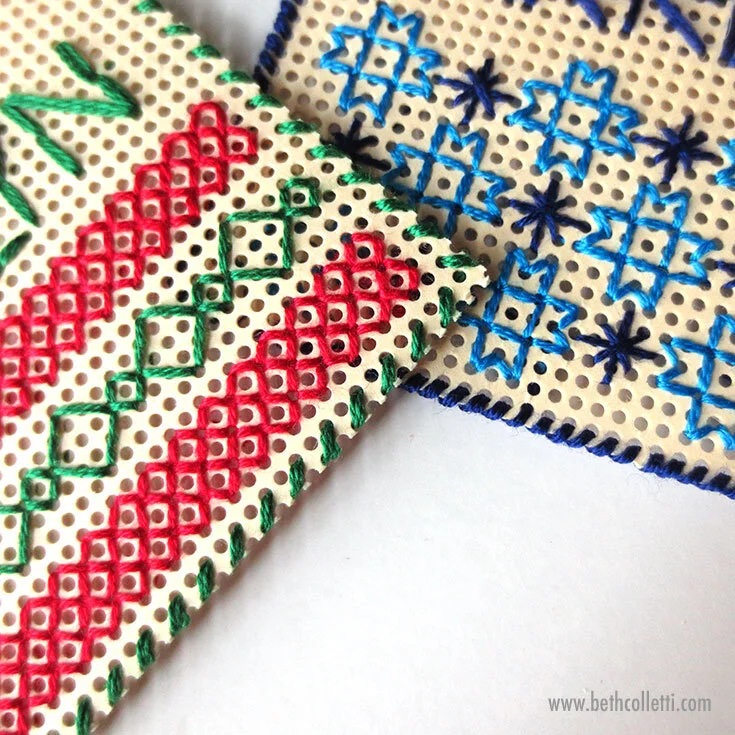
Once your tag shapes are ready, use the Downloadable Gift Tag Pattern for reference as you stitch festive or wintry designs onto your tags. All of these patterns use two strands of six-strand embroidery floss that are worked into the pre-punched holes of the needle work paper in simple straight stitches or back stitches.
Tip: Before you start stitching, rather than creating a knot at the end of your thread, simply stitch over your loose end to secure the beginning of your thread in place.

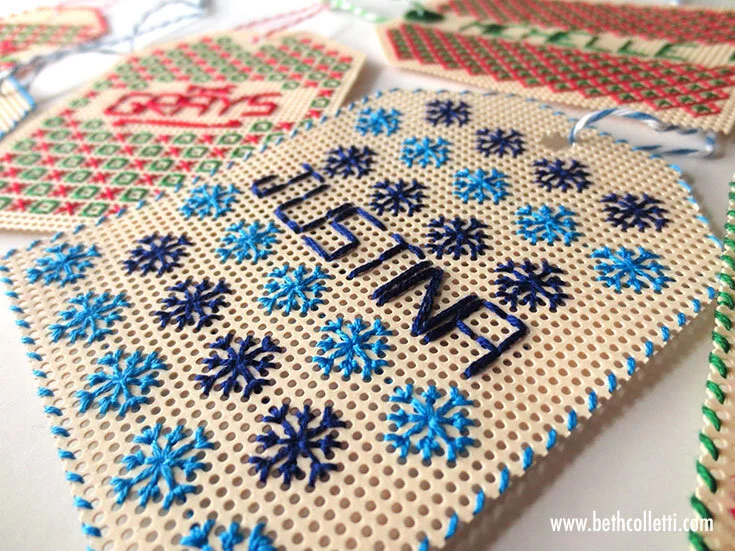
Step 3 - Personalize Your Tags
Once you’ve finished stitching your designs, it’s time to personalize your tags. I used four strands of embroidery floss for this portion of the design so that the text would stand out. Within the Downloadable Gift Tag Pattern I have some sample lettering you can work off of, or you can create your own.
Step 4 - Finish Your Tags for Gifting or Hanging
Use your hole punch at the top of each gift tag to create a hole for hanging. If you’d like you can also decorate the edge of your gift card with a simple overcast stitch as demonstrated below.
Lastly, string some bakers twine through the punched hole so your gift tag can be attached to its package. Not only is this a pretty and thoughtful way to embellish your presents, but the recipient can hang their gift tag with their holiday decor too!