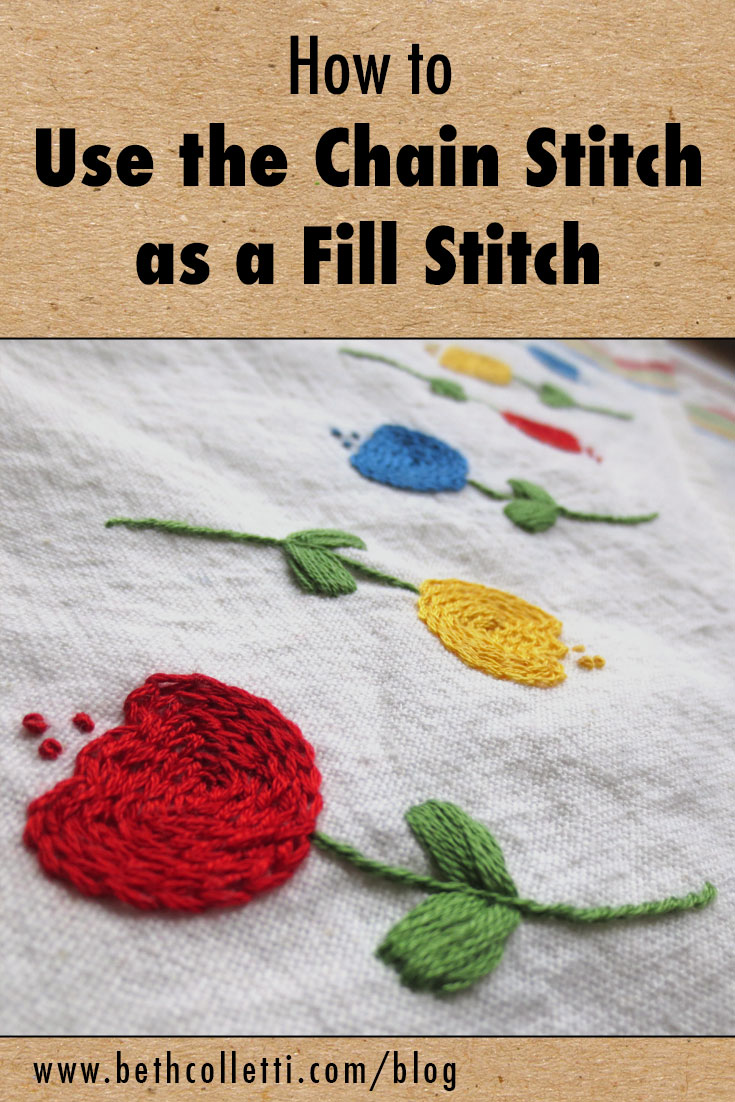
One of the things I love most about hand embroidery is all the different textures you can create with the same fabric and thread depending on what stitches you use. What’s even more fun is taking a traditional stitch and using it in a new way. Using the chain stitch as a fill stitch rather than an outline stitch is a beautiful way to highlight this stitch’s loopy lines. I especially admire the work of Yumiko Higuchi and the way she uses the chain stitch in her work. Explore her Instagram feed here and you’ll see what I mean!
As with many other stitches, filling a shape with the chain stitch can be as simple or complex as the object you’re filling. The chain stitch is accessible to beginners and that means you can easily learn how to use it as a fill stitch too! I’ve created this repeating tulip pattern expressly for the purpose of giving you a simple shape to practice on so you can feel comfortable with the process and incorporate this fill stitch technique into new embroidery projects.

First, a couple of tips!
If you’re new to the chain stitch, watch the video below where I walk you through the basic stitch.
Pretty straightforward, right? But did you know that you can also do the chain stitch backwards?
It’s the same basic stitch, but you start with your end stitch and then loop the thread under it, repeating that motion as you move away from your starting point. Each method is equally valid, so see what you like best!
I experimented with the chain stitch both forwards and backwards on this tulip pattern and found that doing the chain stitch backwards was actually faster for me, and I was pretty happy with the results.
Now if you’re wondering how to actually line up your chain stitches when you are filling a shape, I show you how to do that in the video below:
A few of the tips I mention when you are filling an object with the chain stitch:
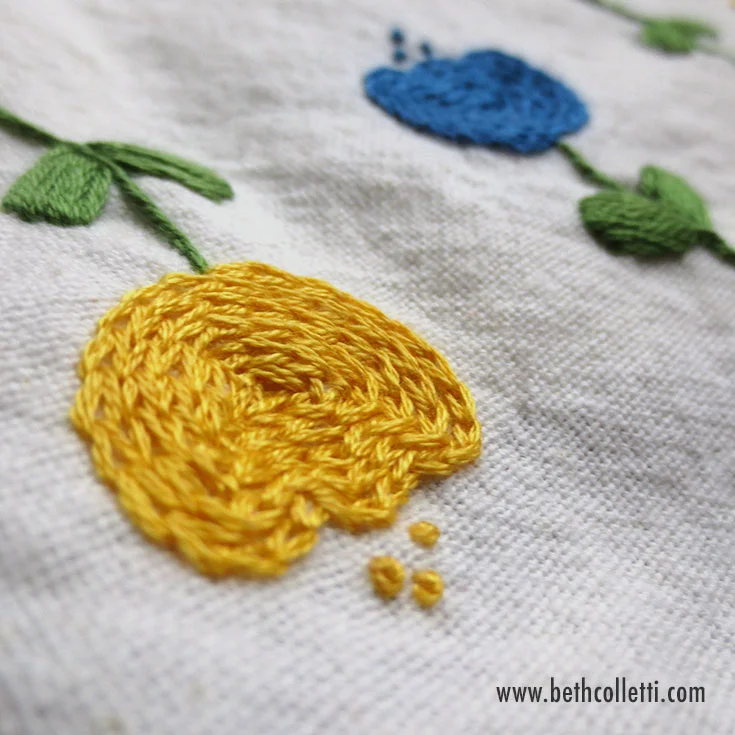
I like to work in a circular motion as I fill a shape, first stitching the outline and then continuing to stitch right next to my first line of stitches. Keep your lines close. This will help prevent too much of the fabric showing through in between your stitched lines.
When I’m going around a corner, sometimes I will tack my chain stitch loop down in two spots instead of just one. This helps the chain’s loops to stay nice and open rather than folding in on themselves on corners.
For finer details, it’s better to use fewer strands of embroidery floss. I used two in the video above and three in the tulip patterns.
Are you ready to try it for yourself?
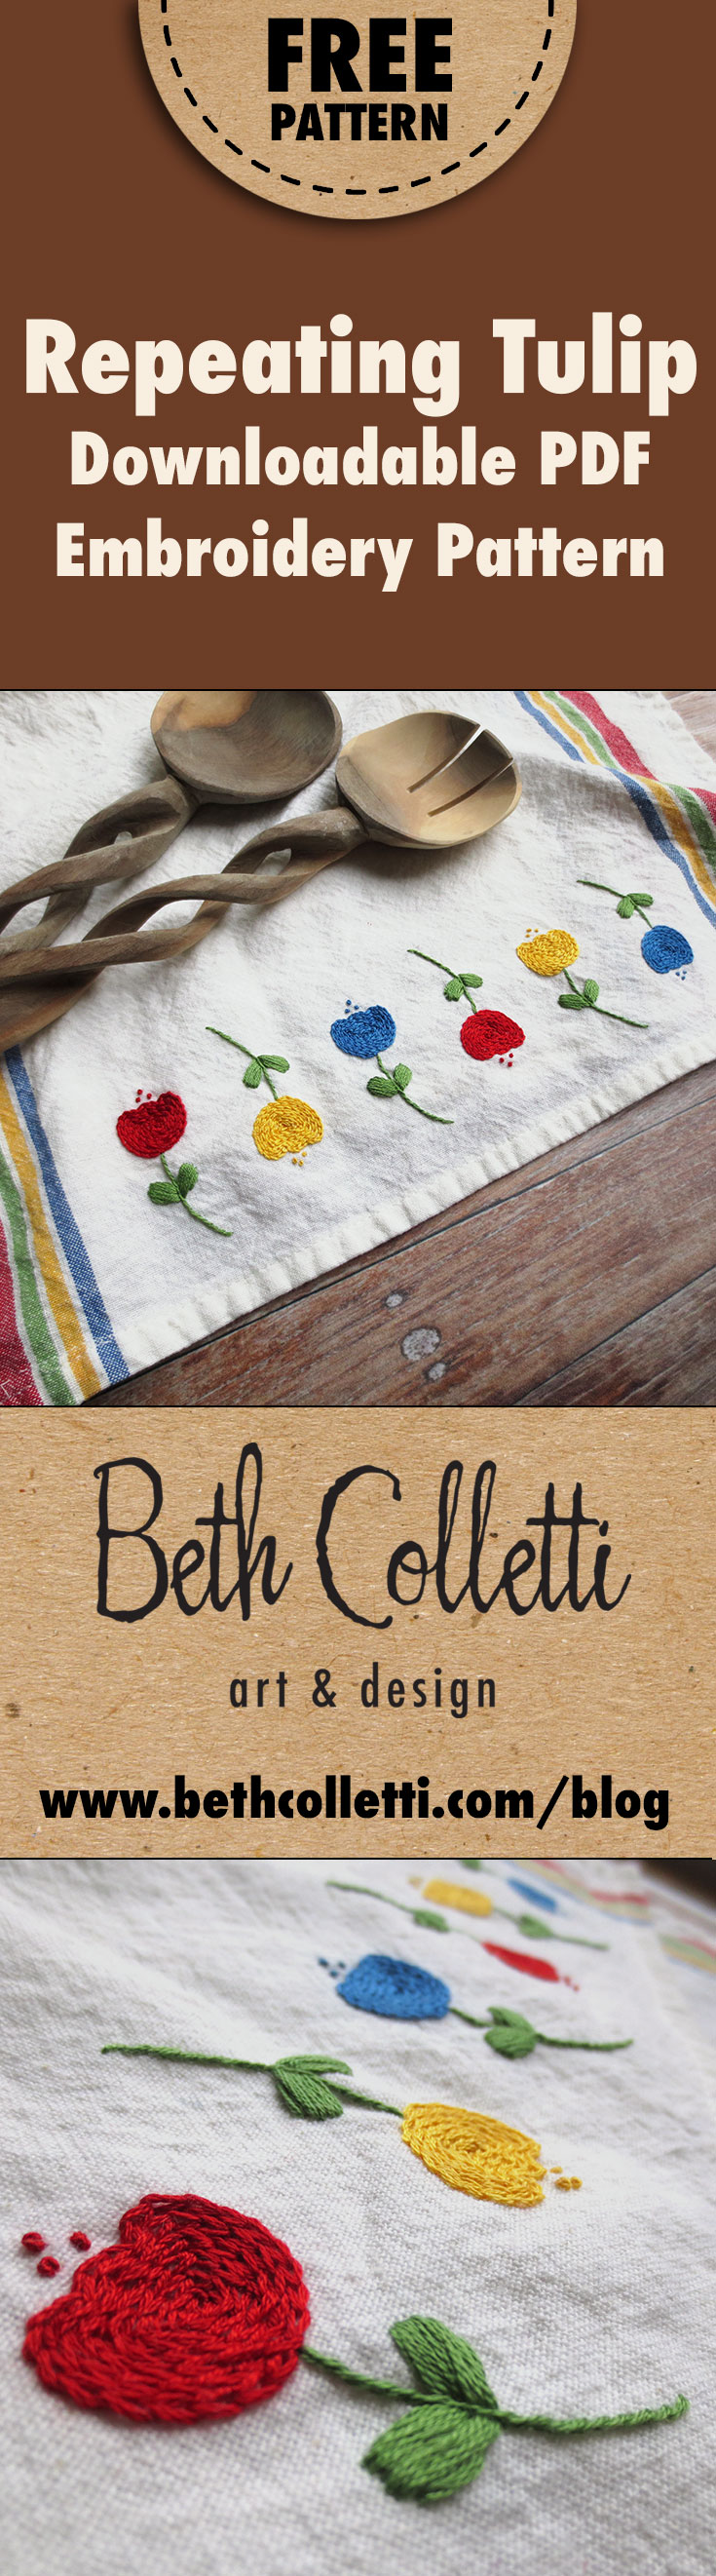
Download the free repeating tulip pattern right here. I stitched this as a border on a blank tea towel from a Jo-ann Fabric and Craft Store, but you can try it on a table runner, a pillow or any number of other projects. Use the colors I featured (I was going for a vintage Dutch folk art look), or change them to something that goes with your decor.
Looking for more practice?
Here’s a tulip-inspired redwork stitch sampler pattern I recently designed which features nine different stitches, including the chain stitch as a fill stitch. You can download it right from my shop!
