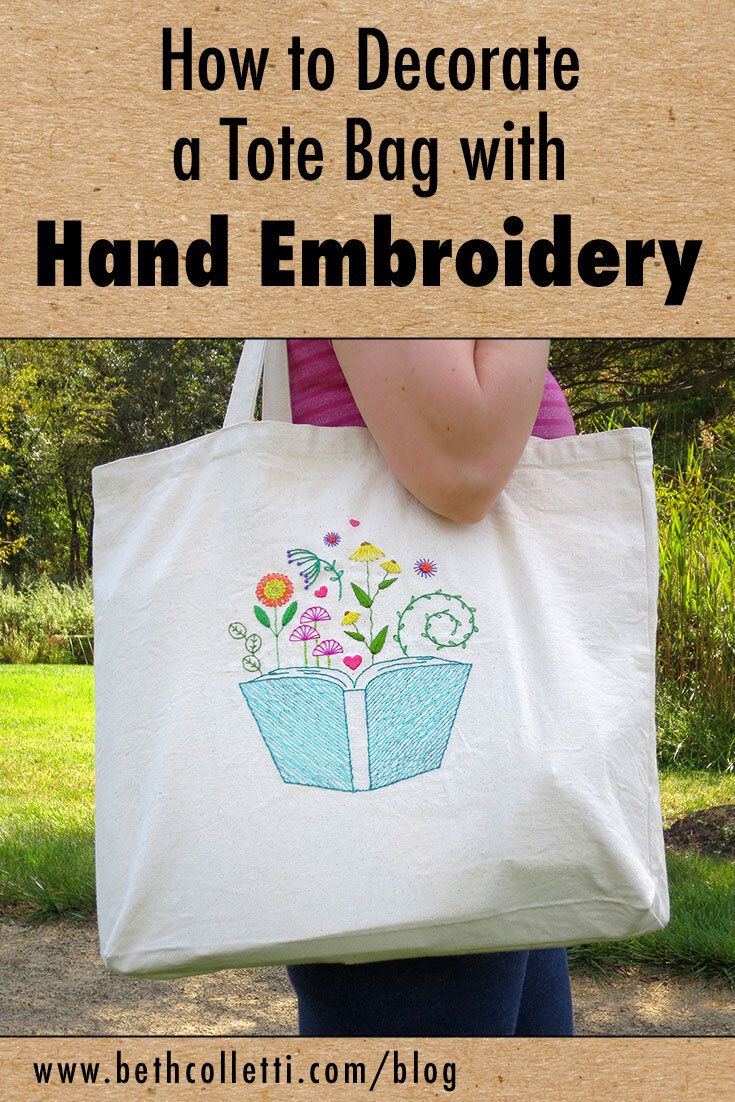
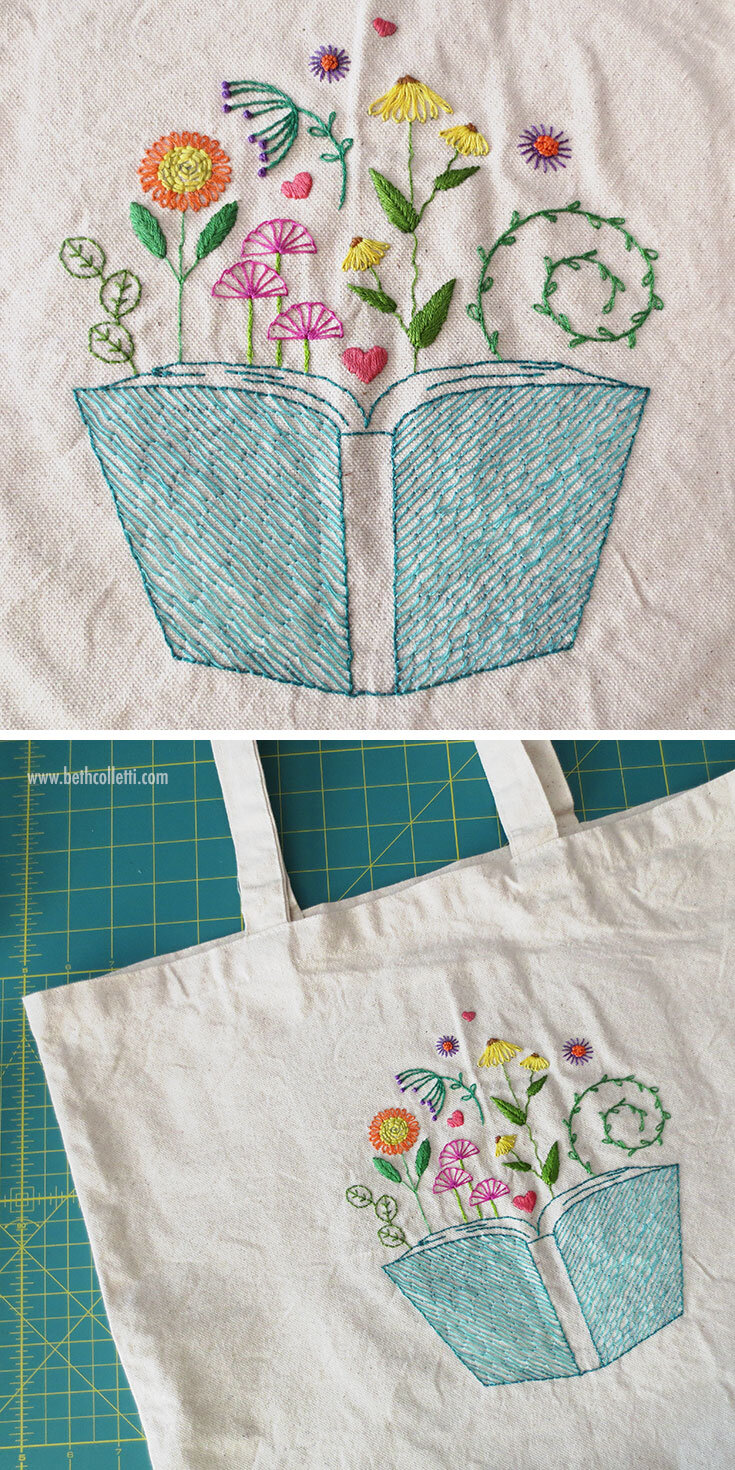
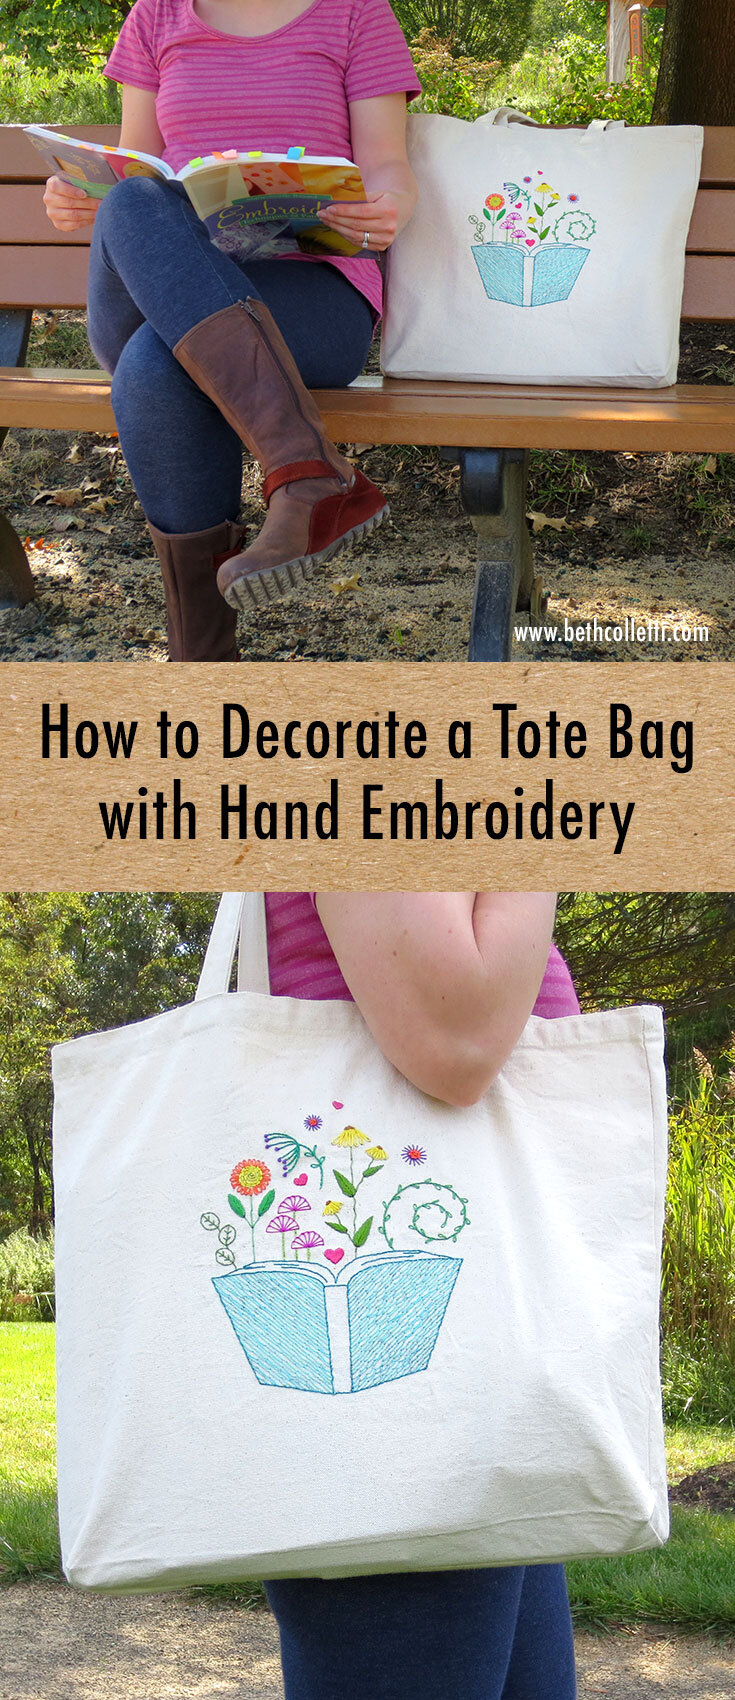
Whether you’re headed to the library, a craft night, bible study or the farmer’s market, a cute tote bag is not only super practical, but also a fun way to show off your style. Canvas totes are especially durable, and canvas is a great fabric for your favorite embroidery project too. Pick up a blank tote from a craft store, or decorate something you already have. For a simple and fun way to turn a plain tote into a decorative bag for everyday use, check out this tutorial!
Supplies Needed
Iron & Ironing Board
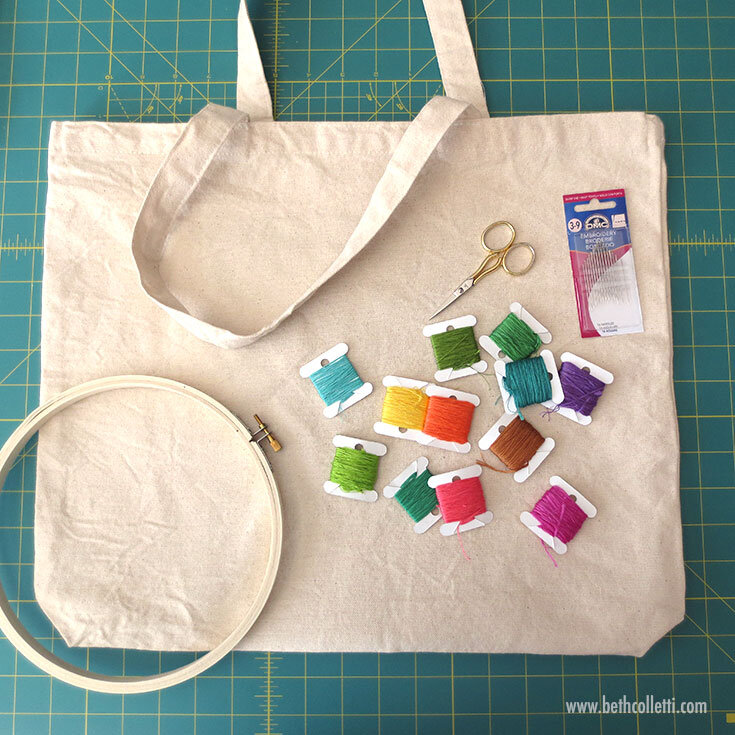
Canvas tote bag
Embroidery pattern (download the book pattern featured)
Printable Dissolvable Stabilizer Paper (or another transfer method of your choice for your embroidery pattern)
Embroidery Floss
Embroidery Needle(s)
Embroidery Hoop (size of your choice)
Embroidery Scissors
Ruler
Felt, large enough to cover your embroidery design
Step 1 - Iron your canvas tote bag
To prep your fabric, press it well to remove any wrinkles. Canvas is a heavy fabric that can be prone to shrinking so don’t use a hot iron on wet canvas. Follow any instructions for ironing that came with your blank tote bag.
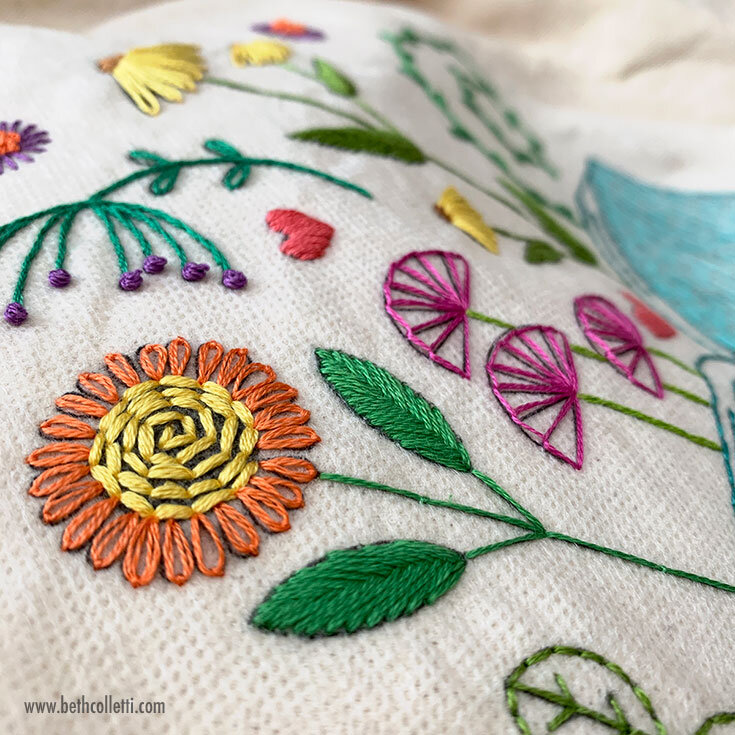
Step 2 - Prep and stitch your embroidery pattern
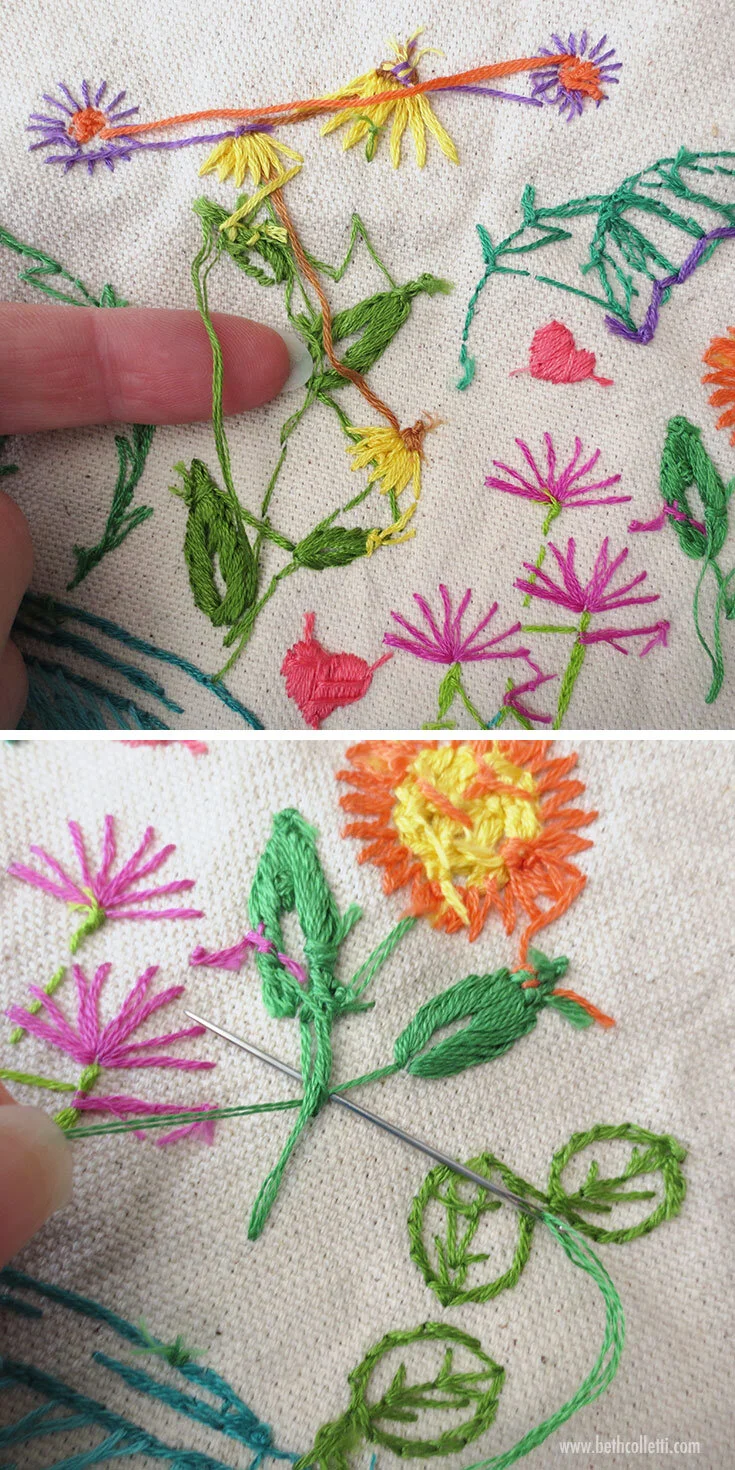
Because canvas is a heavy fabric, I prefer to use printable dissolvable stabilizer paper to transfer my pattern. Print your pattern out on the printable paper, peel off its backing, and press the adhesive onto your tote bag where you want to stitch. Use the floss, needle size and embroidery hoop recommended by your pattern to stitch up your design.
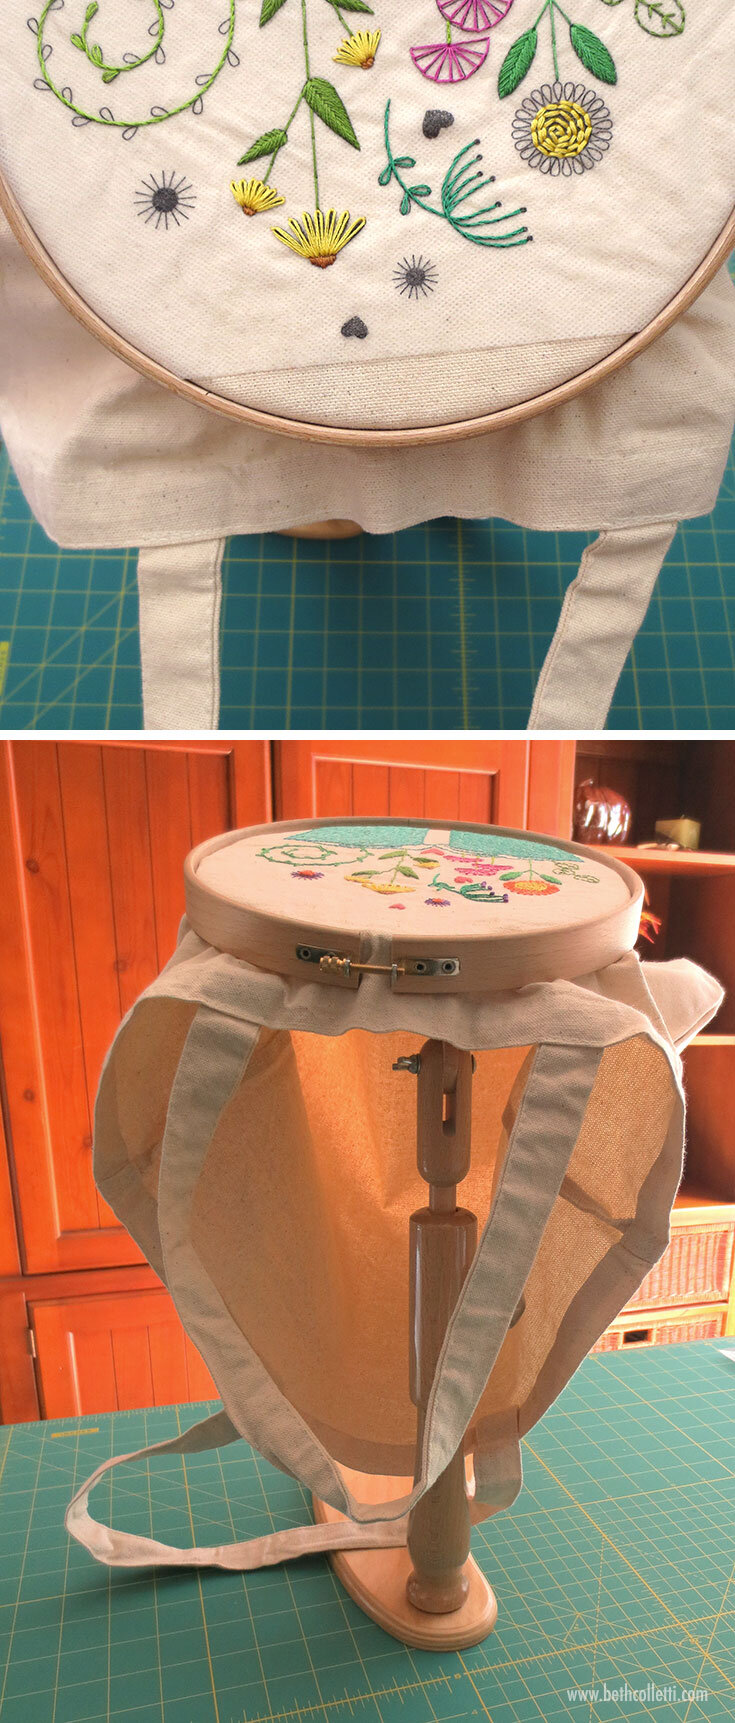
Tip: As you work, stitch with the opening of the bag facing you. This position may mean you are working on your pattern upside down, but it will be the easiest way to stitch without risking stitching through the back side of the bag. My favorite tool to help with stitching is my sit-on embroidery frame which allows me to keep my hands free as I stitch.
Step 3 - Rinse out your pattern
After you’ve finished your stitching, thoroughly rinse out the dissolvable stabilizer paper according to its instructions. Allow your canvas to dry flat for a good 24 hours. When the stitched tote is completely dry, turn it inside out and press the fabric again to remove any wrinkles.
Step 4 - Secure loose threads
Because your embroidery is no longer stretched taut in a hoop, you may find some of the threads in the front or the back of your stitching are loose. Gently pull on any loose threads from the back side of your embroidery to make the front more taut (it’s important to do this delicately), and secure the extra slack to the back of the stitching.
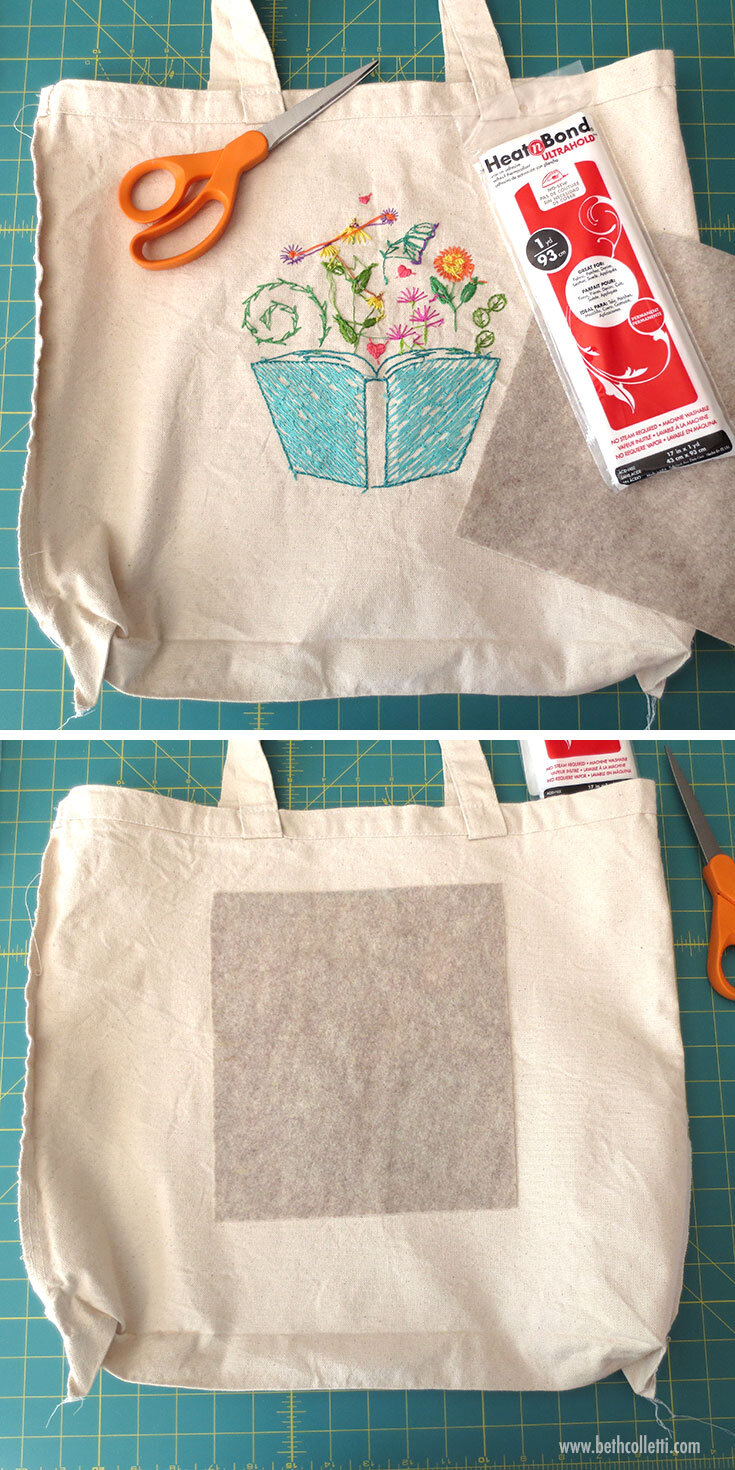
Step 5 - Protect the back of your embroidery
To protect the back of your embroidery from catching on anything you might put into the bag, cut out a piece of felt big enough to cover the back of your embroidery threads. Next cut out a piece of Heat n Bond Ultra Hold® iron-on adhesive to match the size of the felt. Following the instructions for Heat n Bond Ultra Hold®, iron the adhesive to the felt, and then iron the felt to the inside of the bag so it covers the back of your stitches.
(I am an Amazon Associate and from time to time will use affiliate links for products that I love, or that I think you will find useful.)