(I’m an Amazon Associate and from time to time I will use affiliate links for products that I love, or that I think you will find useful. Should you choose to purchase with the provided links, I will receive a small commission at no cost to you.)
In a recent blog post I shared that my husband and I bought a house and are in the process of making it our own. Anyone who’s moved knows that means lots of unpacking, organizing and reorganizing! Now, I really enjoy organizing and I admit I’ve purchased an embarrassing number of bins and organize-y things for the drawers, cabinets, and shelves. They make me so happy! So as you might imagine, I’m having a ball getting all of my embroidery and sewing supplies neat and orderly. In fact the only thing left to do is to label my bins so that I know what’s where. And the most fun way I could think to do that was to create some embellished felt tags!
Felt tags are great for organization and so much more!
Making felt tags is a super simple and quick project that is great for busting those scraps and using leftover odds and ends. You have complete freedom here and can make them as simple or elaborate as you want. This project will satisfy your itch to create without taking months to complete. Plus, I love that these tags are versatile and can be used for more than just organizing. Stitch them up to…
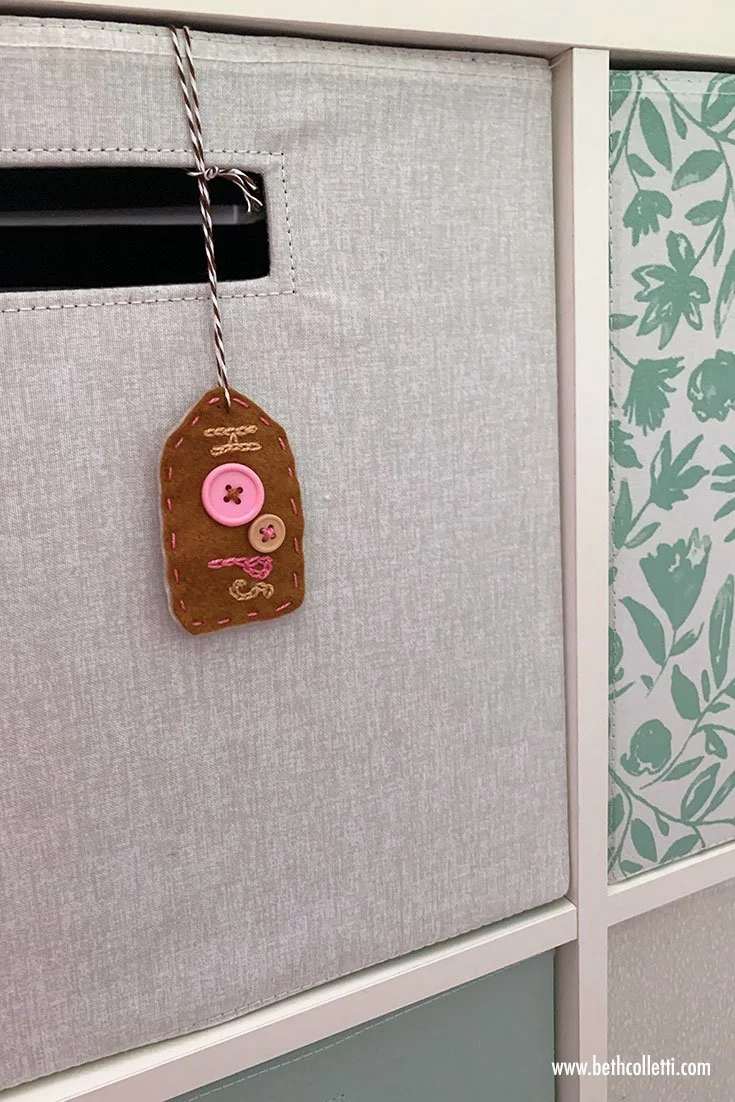
Hang on gifts
Use as table place cards at a holiday dinner
Attach to a child’s backpack as a name tag
Decorate with your word of the year for encouragement
Use as ornaments at Christmas
Attach to a keychain
Turn into a bookmark
Plus more!
Just gather the supplies below to begin. I’ve created a template with tags of various shapes and sizes so you can use what works best for your personal needs.
Supplies Needed:
Wool blend felt (I like to get mine from Benzie Design) or whatever felt you have on hand for the number of tags you want to create
Various scraps of felt, trim, buttons, etc. for embellishment
Baker’s twine for hanging your tag
Six strand embroidery floss and/or pearl cotton embroidery threads in colors of your choosing
Various sized embroidery needles (for six-strand embroidery floss) and/or various chenille needles (for pearl cotton)
Chenille needle, size 18 for baker’s twine
Sharp scissors for cutting out shapes and clipping threads
Sakura Gelly Roll Pens with a medium point in white and/or black for drawing on felt
Straight pins
Needle threader (optional but helpful)
Freezer paper and pencil (optional)
Iron and ironing board to use with freezer paper, if using
Step 1:
Print out the tag template and cut out the tag shape you want to use on your felt.

Step 2:
Choose felt for both the front and back of your tag. Trace around the tag shape onto your felt with a Gelly Roll pen (I suggest using a white or black pen). TIP: You can pin both the front and back pieces of felt together before tracing and cutting so your pieces match perfectly when you cut them out.

Step 3:
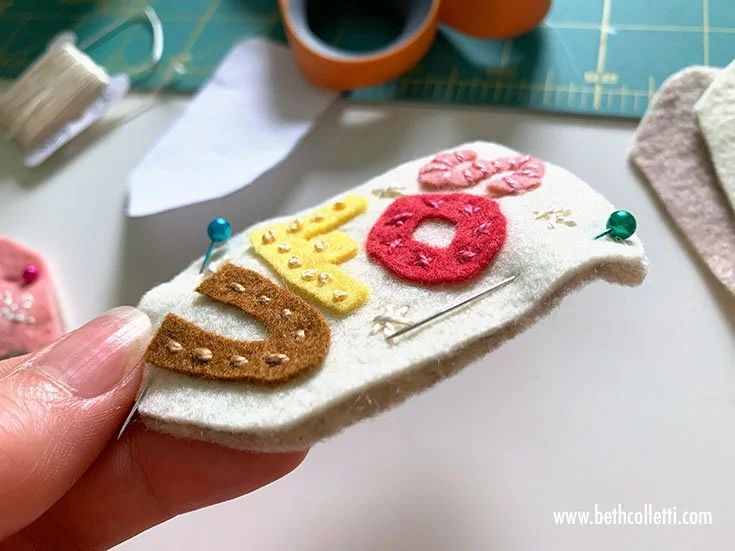
You can either choose to embellish the tag before cutting it out, or after. Some people find it easier to embellish the tag when it’s on a larger piece of felt; I cut my tags out first and then embellish them. For the embellishment, you can decorate the tags as simply or elaborately as you’d like. Here are some ideas:
Cut out shapes or letters with freezer paper and appliqué them to the tags
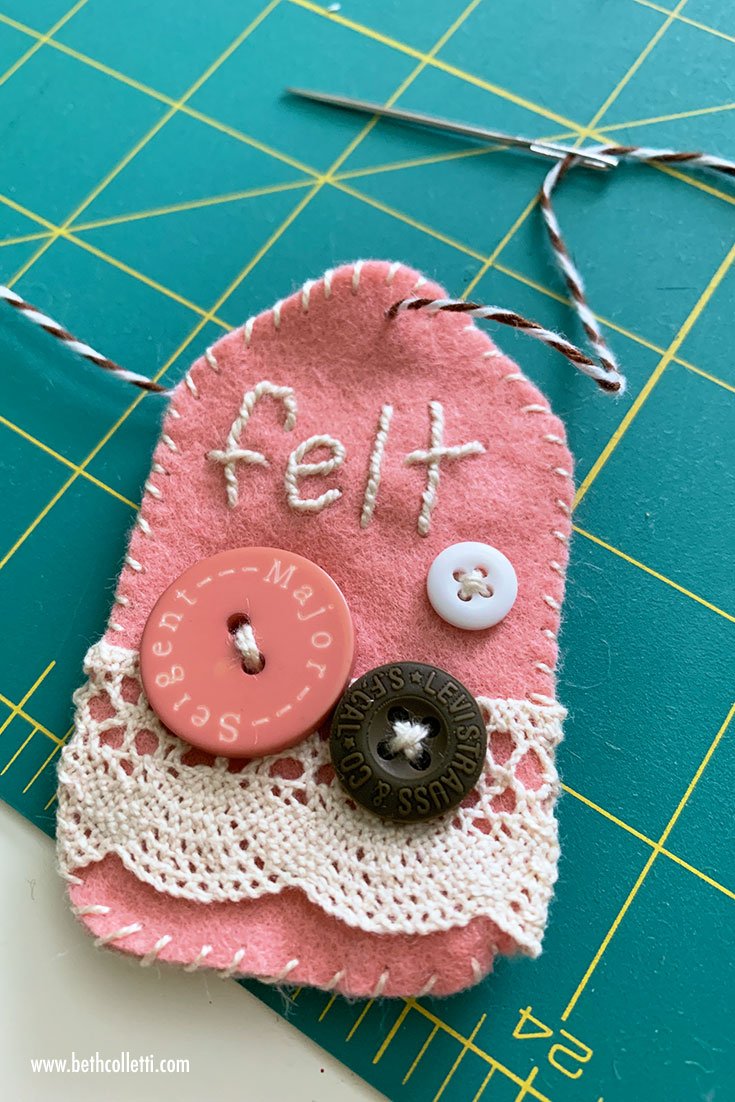
Add buttons for a decorative element or to represent letters
Add bits of trim, such as ribbon, rick rack, lace, etc.
Embellish with stitches
If you’d like to stitch a word on the label, you can do that using pearl cotton threads or six-strand embroidery floss. (For tips on stitching lettering, check out this article or get ideas from my Alphabet Sampler Mini-Course)

When adding trim, wrap the raw edges to the back of the front felt. When you attach the back felt, the raw edges will be hidden.

Use a Sakura Gelly Roll pen to write on the felt and then stitch over it.
Step 4:
Once your tags are embellished and cut out, pin the front and the back together so that the back or your stitches is hidden (right sides will be facing out).
Step 5:
Hand sew the front and back of your tag together with a stitch of your choice. A couple of great stitches to use are a running stitch, a blanket stitch, or an overcast stitch.
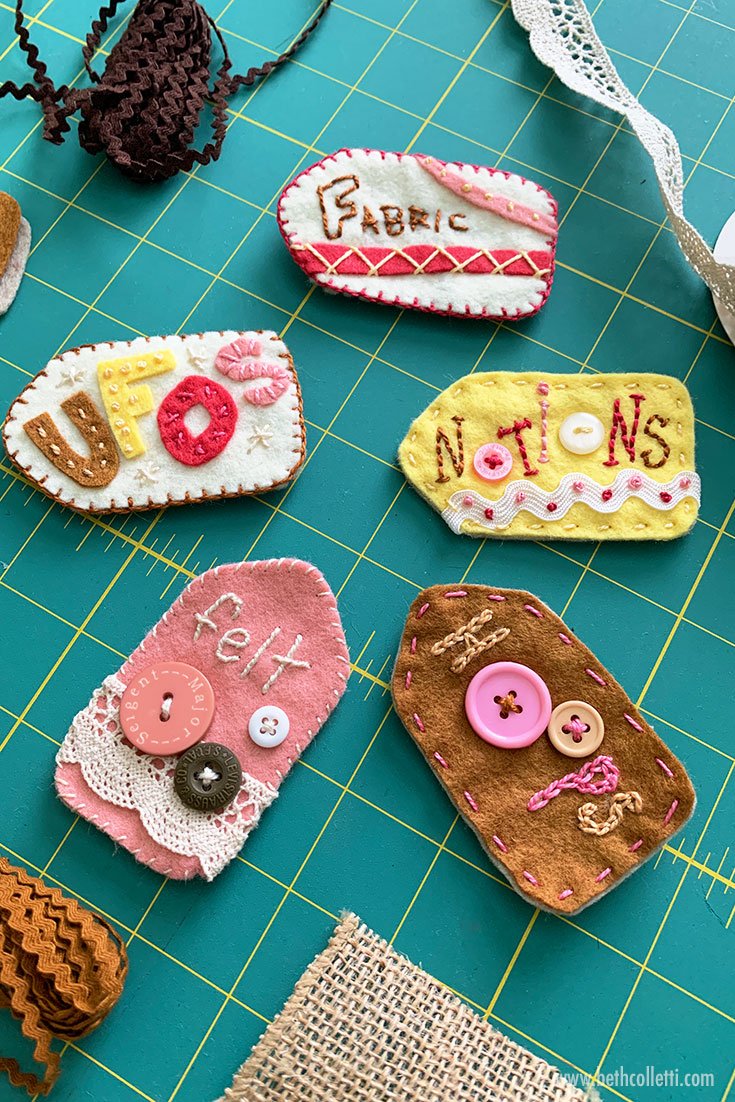
Starting at the top and going clockwise, the stitches I used to attach the front and back are: a blanket stitch on the Fabric tag, a running stitch on the Hoops and Notions tags, an overcast stitch on the Felt tag, and a blanket stitch on the UFOs (UnFinished Objects) tag.
Step 6:
Cut a length of baker’s twine to hang your tag. (I cut mine 15 inches or 38 cm long.) Thread your size 18 chenille needle with the twine and stitch through the end or corner of your tag. You can either tie the ends together and hang the tag through the loop, or tie your tag directly to whatever you are organizing or labeling. TIP: You can also use silk ribbon, tapestry yarn, or other types of cording to hang your tags - just be sure you have an appropriate needle to attach it.